Friday Night Allied Battle!
Last Friday was another night for Warhammer 40,000 - although this time we had a fourth player, allowing us to play a 'two-headed giant' style game. Matthew, an old friend of mine from my adolescence, made contact via this blog and managed to find a babysitter for the night.
Marc and I formed an Imperial alliance with my Blood Angels and my wannabe Imperial Guard Armoured Company. Matthew and Justin took the other side of the table with Chaos Space Marines and Dark Eldar.
I was a little apprehensive facing the new Dark Eldar codex - but managed to get a very broad idea of their tricks by reading the November White Dwarf battle report and getting a quick summary from Riptide on 40kNation.
After a little socialising and a lot of secret planning we got down to business. Matthew brought the Battle Missions book and we rolled up a Dark Eldar "Feigned Retreat".
 Feigned Retreat: The board is divided into thirds with the Dark Eldar forced to deploy bait in the centre zone. Victory Condition: Kill points.
 Imperial Deployment: Blood Angels Predator "Archon" and Vindicator "Cauldron" positioned forward with Razorbacks and Imperial Guard Leman Russ' up against the backline.
 Chaos Deployment: Justin places a wedge of Predators on a flank supported by some footslogging Chainfist Terminators and a Rhino seeking cover in the background. This warband seems to have raided an Ultramarines motor pool ;P
(The very handy green Deployment Zone marker is from Gale Force Nine, sadly I placed it upside-down so the words are flipped)
 Dark Eldar deployment: Raiders lurk behind the woods. In the top left another of Justin's Chaos Rhinos, having been chosen as bait, wisely hides behind an unpainted Bastion supported by another Raider. Yes, the sun was still up when we started.
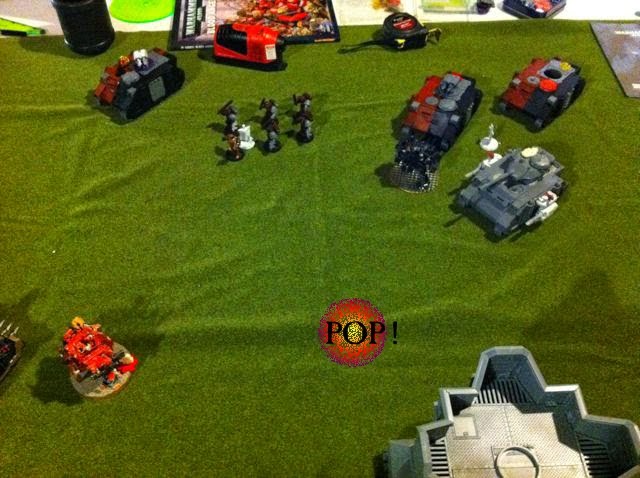
 Dark Eldar Deployment: A clearer photo of the above-mentioned Rhino bait. As you can see there is a potential face-off between the Raider's Dark Lance in the foreground and my Predator Annihilator in the distance.
 And we're off! Leman Russ Vanquisher hits and kills the Raider shown in the previous image.
 The passengers tumble out of the wreck - that should slow down the Dark Eldar HQ and his friends a little.
 Surprise! Meanwhile on the other side of the table my Librarian Furioso lands in his drop pod on-target and immediately behind the wedge of Chaos Predators! Sadly his Blood Lance fails to penetrate their rear armour (I roll two ONE's!!! wth!?) .
 But my Predator and Marc's other Vanquisher manage to shake and stir two of the Chaos Predators.
 Justin's chainfist Terminators assault the Librarian Furioso. My Dreadnought manages to kill five of the seven Terminators (making up for his bad luck with the Blood Lance) although he loses both arms in the process.
 Matthew and I consult a faded printout of the Imperial Guard roster. Tilting the head sideways helps get oxygen to the part of the brain which is used for readin' rules. Sadly I have chosen the wrong angle.
 Marc mocks us with his blurry hand technique. I can't recall what we're trying to figure out but it looks important. The sun has set...
 Dark Eldar Talos emerges from a Webway portal on the blindside of the Bastion. All armour is instructed to bring it down before it can get its claws into our metal hides!
 Chimera transports arrive from reserve and immediately wish they didn't. Perhaps they can linger behind the wood and wait for some Dark Eldar infantry to come closer...?
 The tide begins to turn: The armour exchange continues on the left flank; a Chaos Predator loses its weapon but my own Predator is wrecked :(
 The tide continues to turn: A second Talos appears from reserve via the Webway portal and they both run at the nearest tank. A grey Raider has snuck up the side of the table while the Razorbacks and Leman Russ' sent shots wild over the top of the seemingly more-immediate Talos threats.
 The tide has turned... okay no more talk of tides: Imperial forces pull back to the starting line to try and put some distance between themselves and the Dark Eldar... classic Imperial Guard tactics but not a good sign!
 Unpainted Raider unloads its cargo of Dark Eldar Incubi... uh-oh...
Meanwhile Matthew demonstrates the terrible power of his nearest Talos by allowing it to pinch his finger. Or something.
 I attempt to show Marc how to move his tanks to avoid a traffic jam while he laments my lack of confidence in his ability to maneuver armour. To be fair I got in the way of his Vanquishers twice - mercifully the error was detected (by Marc) before our Movement phase ended both times.
 On the topic of maneuvering armour, we manage to coordinate a defensive line to protect the thinner Chimera transports from the advancing Chaos Predators by hiding them behind my shaken Vindicator.
 One of my Razorbacks explodes when attacked by a Talos. As the passengers tumble out they are assaulted by Dark Eldar Wyches, although before they are cut down my HQ Librarian Malpheus kills the Talos with his Force Weapon. This photo shows the aftermath of a crater depicted with green corner markers while the Wyches gleefully cavort away. Cheeky!
 Conga Line! Shuffle to the right! The Chimeras continue to seek protection behind my Vindicator while opening a fire lane for the Vanquisher in the table corner.
 Dark Eldar Incubi in the centre of this photo have been whittled down by one of my assault squads, who in turn were destroyed.
 Dark Eldar Incubi assault the nearby Leman Russ, Immobilising it and (due to the vehicle squadron rules) destroying it! Chaos marines disembark from their Rhino and assault my empty Razorback, destroying its heavy bolter and Immobilising it.
 Endgame: Imperials have been pushed right up against the back of the table and have suffered many losses, in part due to my aggressive Blood Angels throwing themselves into the fray. Chaos has lots of shaken, stunned, weapon destroyed and immobilised tokens on them but frustratingly few wrecks.
Dark Eldar / Chaos Space Marines: Eight Kill points (Victory!)
Blood Angels / Imperial Guard: Four Kill points (Defeat)
It was great to have Matthew join us and certainly good to see him again after all these years, although sadly we had too little time to catch up properly. The battle was enjoyable (despite our loss) and I like mixing up the forces by playing allied 1000 point lists as it presents interesting blends of strengths and weaknesses.
In post-match analysis I put too much effort into trying to kill the Chaos Predators and thus neglected the greater threat of rampaging Dark Eldar advancing under the frustratingly inaccurate hail of Imperial Guard fire up the flank. Placing three tanks opposite the Chaos Predators was not required, although they did manage to lock things down over there I suspect the Vindicator probably should have moved Flat Out once it was Shaken to help kill Dark Eldar instead of ping shells off Chaos Marine armour.
I have mixed feelings about the drop-pod Librarian Furioso, perhaps Blood Lance is not required (although Might of Heroes was fantastic!). Broadly I think the Drop Pod Assault requires more drop pods to work. One creates a distraction but three (or more) would be more effective - having walkers dropping into your rear is a threat that cannot be ignored.
Having Matthew there was good to learn a few more of the rules that had slipped past me and I hope Marc and Justin moved further up the learning curve too :)